Welcome To Apache Shindig!
Apache Shindig is an OpenSocial container and helps you to start hosting OpenSocial apps quickly by providing the code to render gadgets, proxy requests, and handle REST and RPC requests.
What is Apache Shindig?
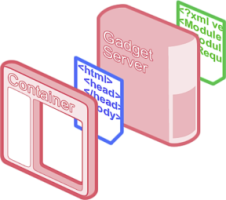
Apache Shindig's goal is to allow new sites to start hosting social apps in under an hour's worth of work. Apache Shindig is a container for hosting social application consisting of four parts:
- Gadget Container JavaScript: core JavaScript foundation for general gadget functionality (read more about gadget functionality). This JavaScript manages security, communication, UI layout, and feature extensions, such as the OpenSocial API.
- Gadget Rendering Server: used to render the gadget XML into JavaScript and HTML for the container to expose via the container JavaScript.
- OpenSocial Container JavaScript: JavaScript environment that sits on top of the Gadget Container JavaScript and provides OpenSocial specific functionality (profiles, friends, activities, datastore).
- OpenSocial Data Server: an implementation of the server interface to container-specific information, including the OpenSocial REST APIs, with clear extension points so others can connect it to their own backends.
Apache Shindig is the reference implementation of OpenSocial API specifications, versions 1.0.x and 2.0.x, a standard set of Social Network APIs which includes:
- Profiles
- Relationships
- Activities
- Shared applications
- Authentication
- Authorization